All services of the company need to buy some goods or services. To be able to control the amount of purchases, you must set up a validation workflow called a release strategy.
Module MM – SAP version ECC / S4HANA
A) What is a purchase order release strategy?
A PO release strategy is a validation process to control a purchase order usage in SAP system. Since the validation process is not fullfilled, the purchase order is blocked.
A PO release strategy is a process combining several criteria (called characteristics in SAP) from the purchase order. Once this combination of criteria (like the amount + purchasing organization + plant of the material) is set on a purchase order, it is assigned to a group of validators, usually managers responsible of a threshold of expenses. SAP offers from 1 to 8 levels of validators. You can define freely the criteria entering the composition of your release strategy. In the following explanations, we have defined our own model.
B) Define the class and characteritics for the release strategy
Characteristics are master data in SAP. They are linked to a class of characteristic. In SAP, there are several classes types available, and for the PO release strategy it is the class type 032.
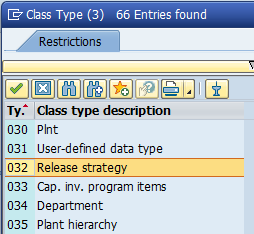
(To have the technical view of the class, go to table KLAH).
Create the strategy using the transaction code CL01. It is a prerequisite to be able to assign the characteristics.
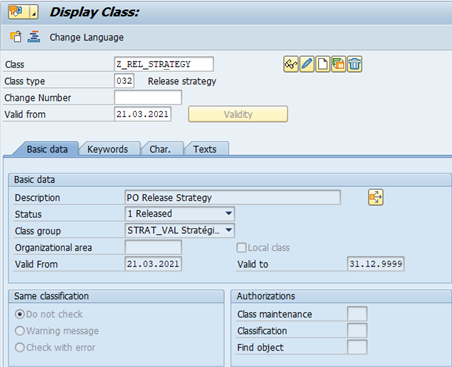
The tab “Char.” is the place you will add the characteritics once you will have created them (tcode CT04)
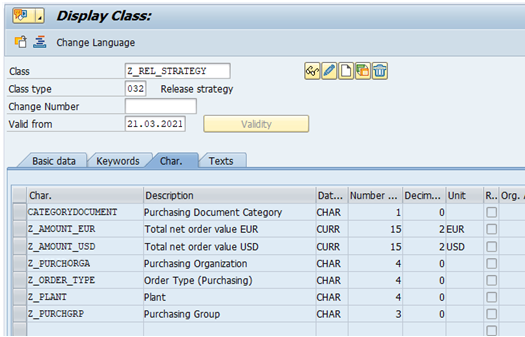
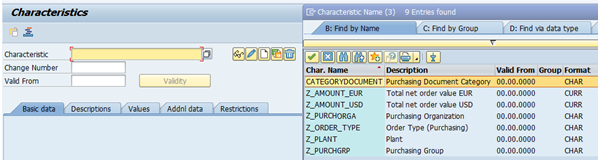
Go to the transaction code CT04 to define the list of characteristics you want to combine within your release strategy.
You have to think about the relevant parameters you have in a purchase order, and when brought together they are composing a logical set of data to control a purchase. Here is a classical list of characteritics:
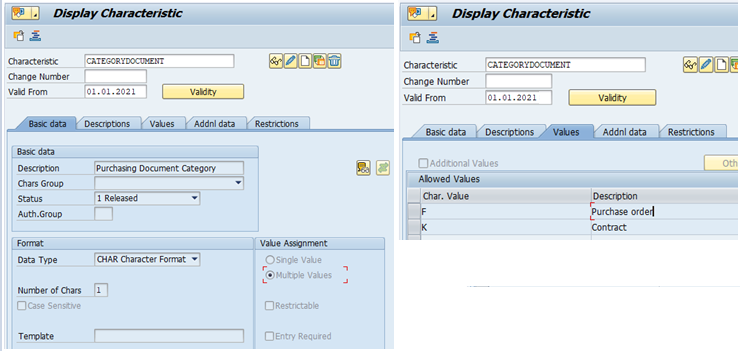
The purchasing document category is mandatory. It is the standard ID of the purchasing document. The value “F” stands for a purchase order, and the value “K” stands for a contract.
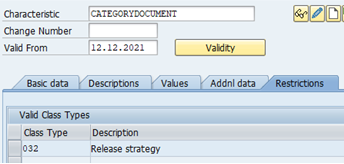
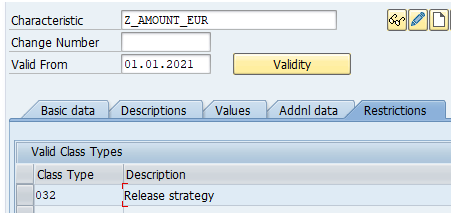
and you must restrict this characteristic to the class type 032.
The amount in currency is a characteritic where you will define the values of threshold amounts to associate to the validators.
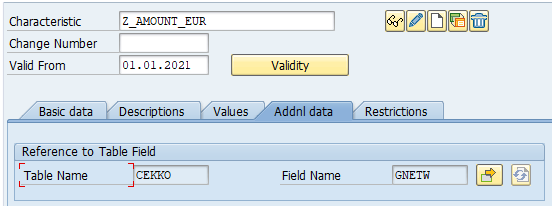
The characteristic Z_AMOUNT_EUR is used to define the threshold amounts in EUR currency.
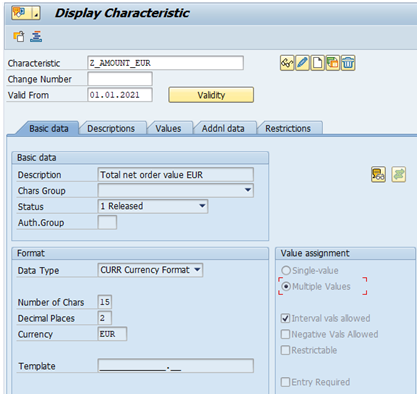
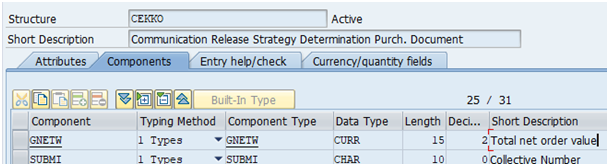
The characteristic must be declared from the dictionary field CEKKO-GNETW. Always start by this tab “Addnl data” to define the reference field of your characteristic. It is important to avoid some error messages.
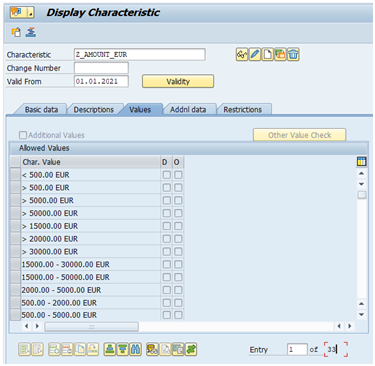
You can define as many ranges of amounts as many strategies you need. The principle is to say, for instance, if a purchase order amount is between 1000 to 50000 EUR, who in the company will be responsible to validate this purchase and how many levels of validators do we need to be sure we secure the process. The levels of validation must be assigned by level of responsability, from the lowest to the highest.
Examples:
Under 1000 eur, we decide no validation is required.
From 1000 to 5000 EUR, validation is needed from the team leader.
From 5001 to 20000 EUR, validation is needed from the team leader, and the service manager.
From 20001 to 50000 EUR, validation is needed from the service manager and the director. Etc….
You can use the signs “>”, “<“, “<=”, “>=”, or define a range like 15000 – 30000 EUR. The format will follow what is defined in the tab “Basic data”.
and you always add the restriction to the release strategy.
If you want, you can define only one characteritic related to the amount. Then, when you will create a purchase order in another currency than the currency of your characteritic Z_AMOUNT_EUR, SAP will translate the foreign amount to EUR to know what is the corresponding range. In that case, the exchange rate between EUR and the currency of the PO must be declared in tcode OB08.
If you choose to manage several characteristics “amount” for your release strategy, you must maintain a technical entry in the values of each amount chararteristic. This “technical entry” is >= 0.00 XXX where XXX is the currency of the characteritic. So in Z_AMOUNT_EUR, you must add the entry >= 0.00 EUR, if you declare another amount characteritic like Z_AMOUNT_USD. And in Z_AMOUNT_USD also you must add an entry >= 0.00 USD.
Why ? because you must understand that all the characteristics you restrict (see tab Restriction with value 032) to your release strategy Z_REL_STRATEGY are composing a selection key, like if you are doing a request in the data browser SE16N on the table EKKO (purchase order header data) join to table EKPO (purchase order items). If your PO is set with 1000 EUR, and you don’t add the entry >= 0.00 USD for the Z_AMOUNT_USD characteristic, SAP will check if you have defined a generic value in USD compatible with the 1000 EUR of the purchase order. Without the entry >= 0.00 USD, the selection key will not match with the data in your PO and the release strategy will not work.
Follow the same logic to define all your characteritics in CT04.
The table CABN contains the data defined in CT04 tcode.

Characteristic’s values are in table CAWN.
C) Activate the workflow for the PO release
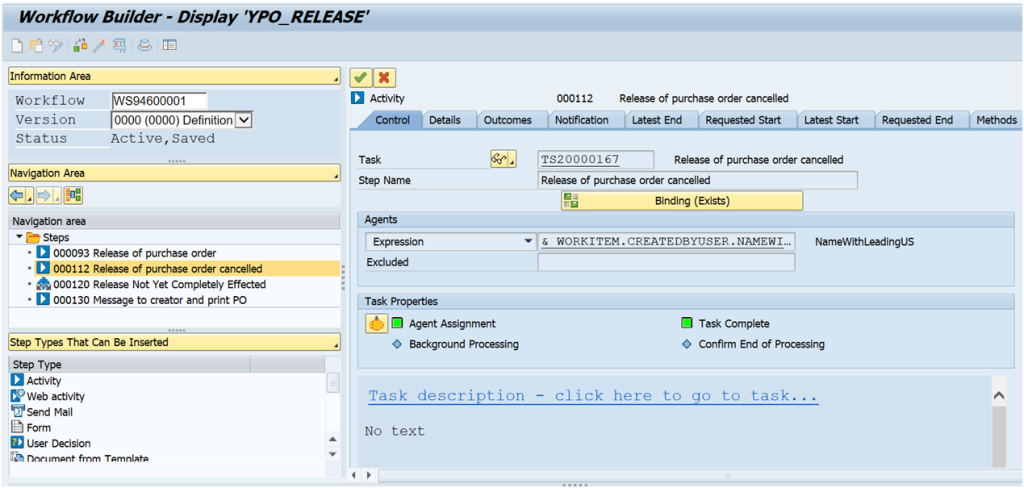
Go to tcode SWDD (workflow builder) and copy the standard template “wf_po_rel” for the workflow PO_RELEASE.
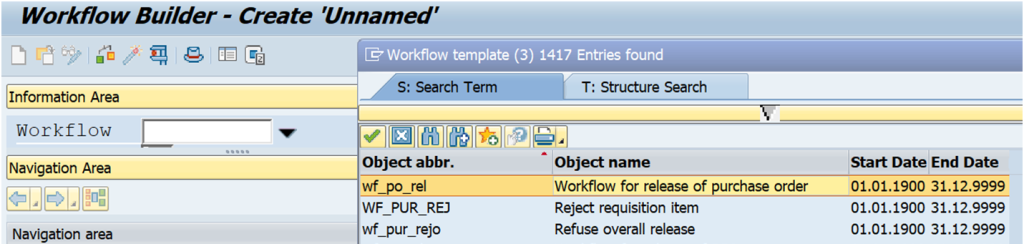
When you will save it, SAP will assign a new workflow id to your new workflow.
We want to add a condition step to send an email to the next validator of the PO until it reaches the last step of the release strategy, where the workflow is completed, and the PO is validated.
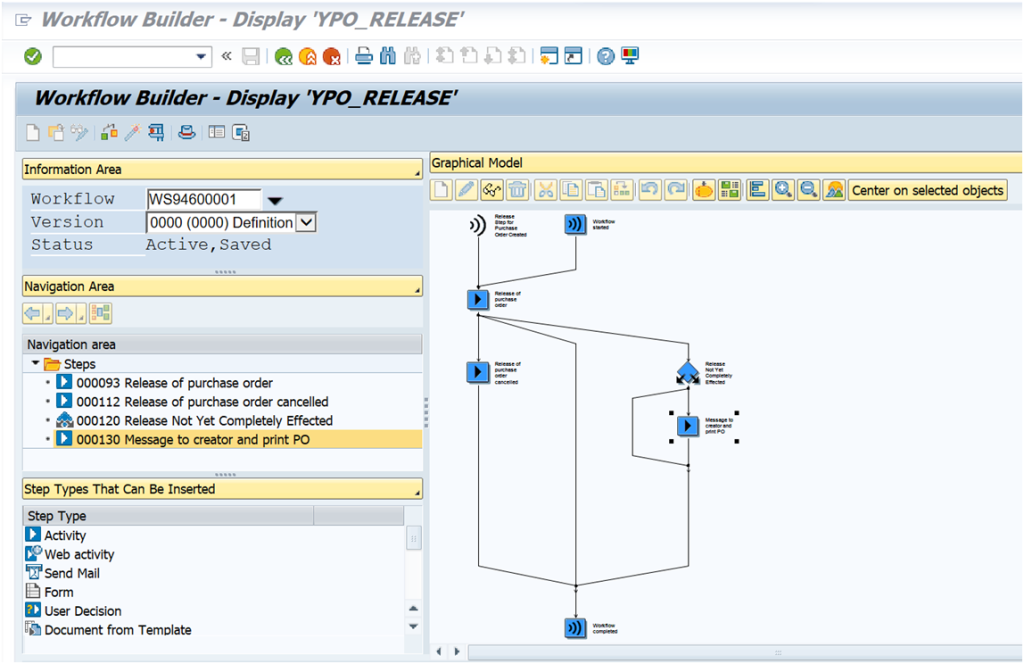
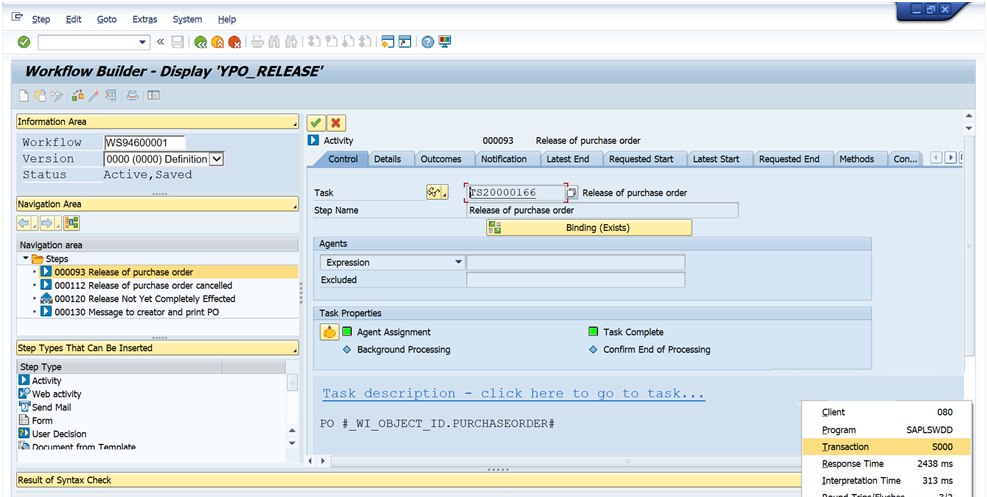
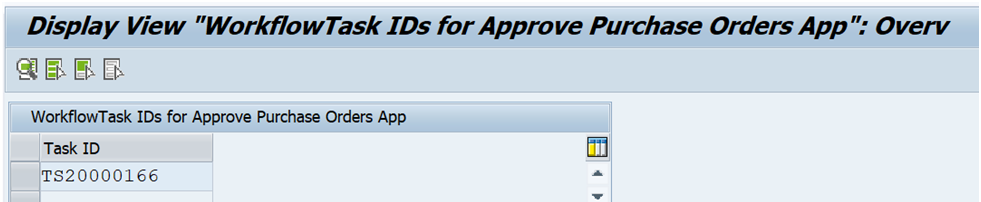
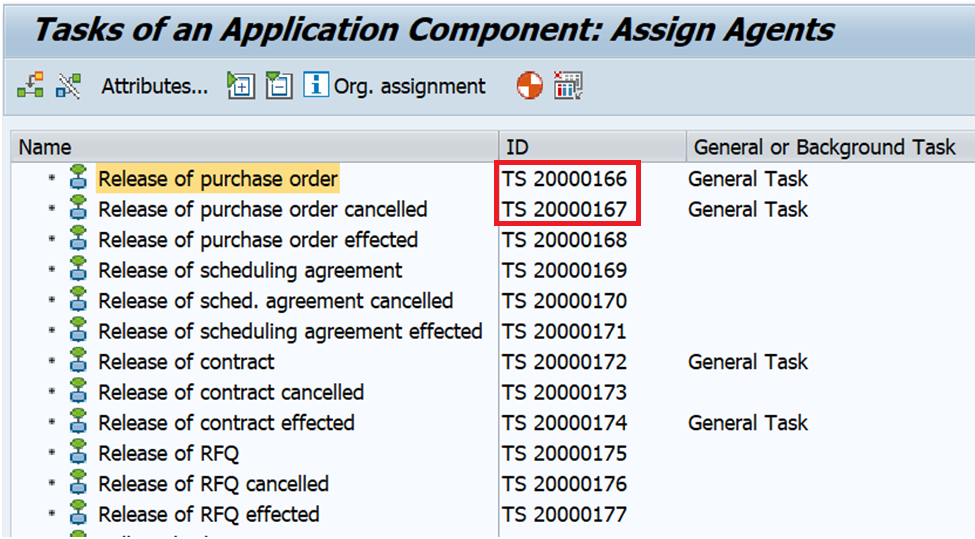
Manage the tasks associated to your own version of this workflow. In our example, task TS20000166 is the one to generate a work item for each validation step.
Then we have a task TS20000167 corresponding to the cancellation of the release of the PO.
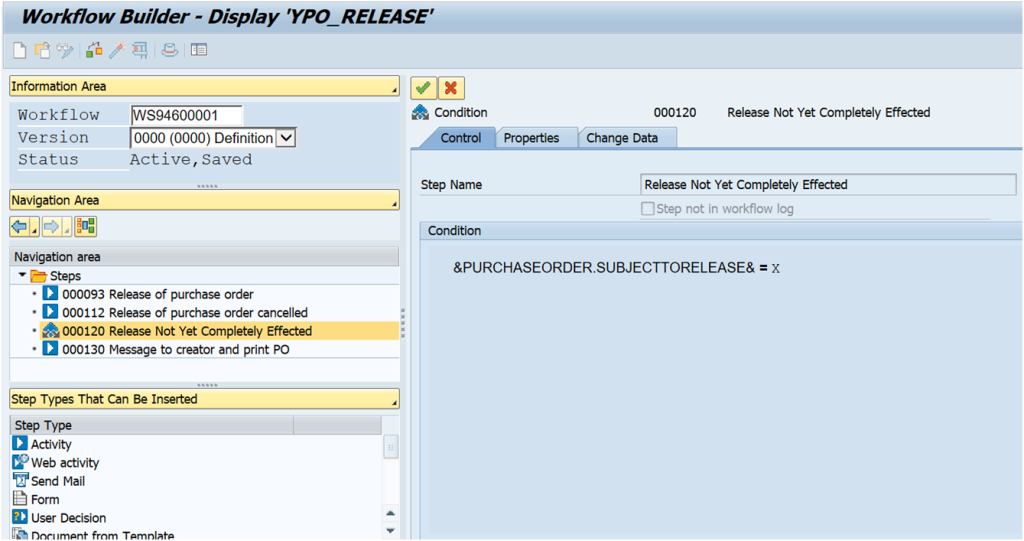
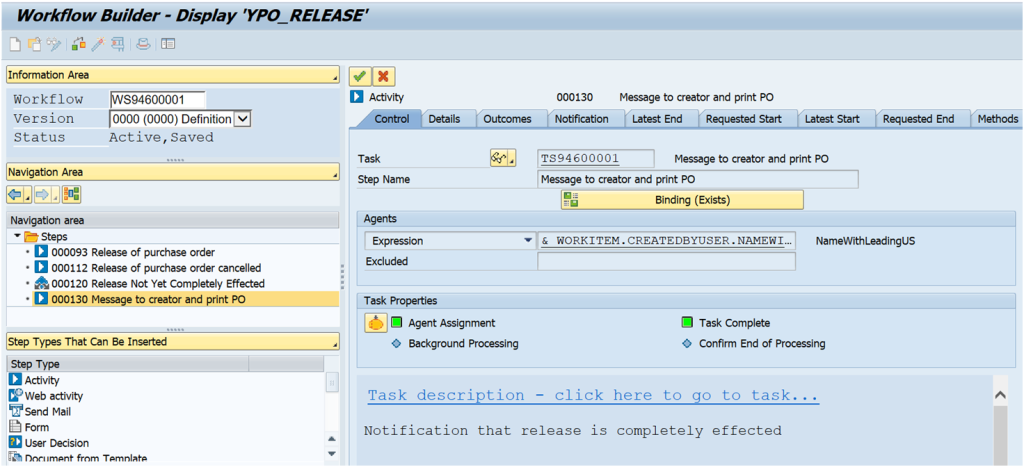
The next step is a condition checking if the status “completed” is set. If not, then it goes to the next step which is to send an email to the next validator.
You must assign the task TS20000166 for the validation steps to the customizing point “Approve purchase order app”:
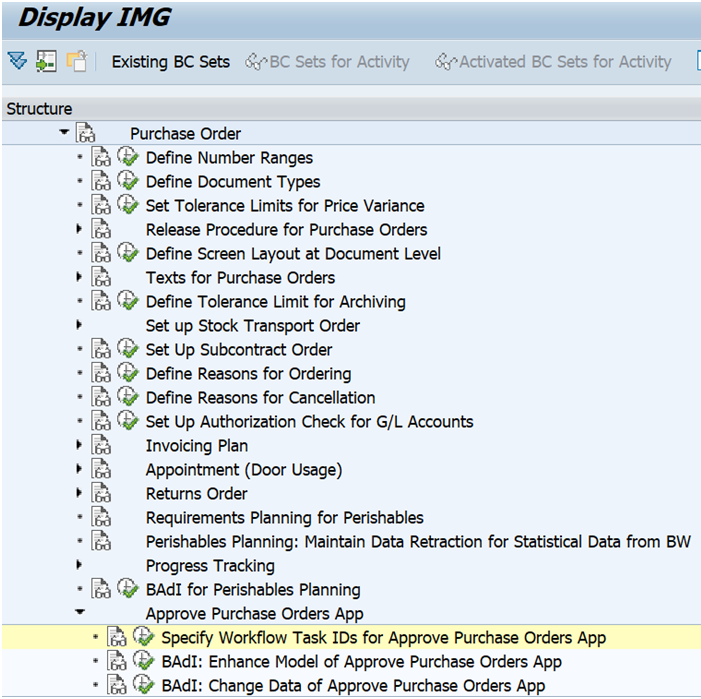
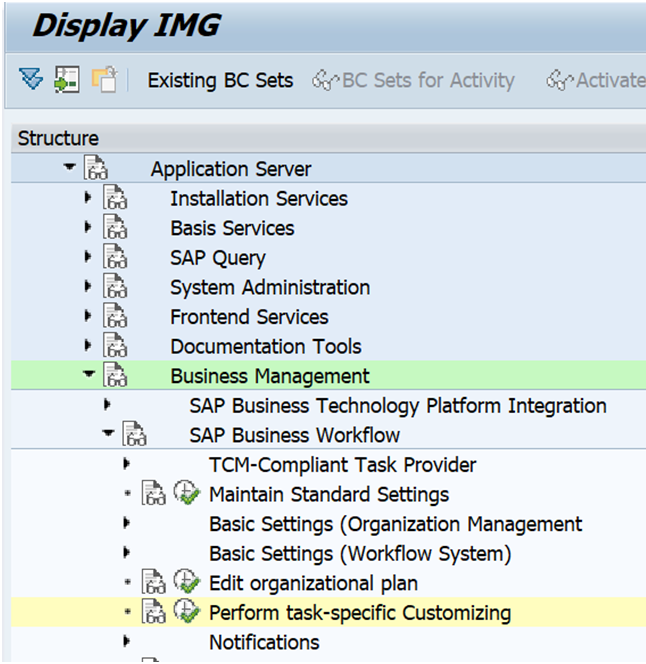
You must linked them to the relevant standard tasks in task-specific Customizing (Basis -> Business Management -> Business Workflow -> Perform Task-Specific Customizing).

Automatic email sending with standard program RSWUWFML2 :
Each time a validator will validate his release code of the strategy using tcode ME29N, a work item will be created by SAP. If you mention the task TS20000166 in the selection screen, the program will check all work items related to the release task TS20000166 with a status ready (check the status with tcode SWI1 or SWIA), and from the user name assigned in PPOME to the release code, it will go to SU01 (user data) and find the email address of the user, and it will send an email to the user to remind he has to validate the PO.
D) Define your organization and assign the person in charge for each level of validation.
Use the tcode PPOCE to create the levels of your organization.
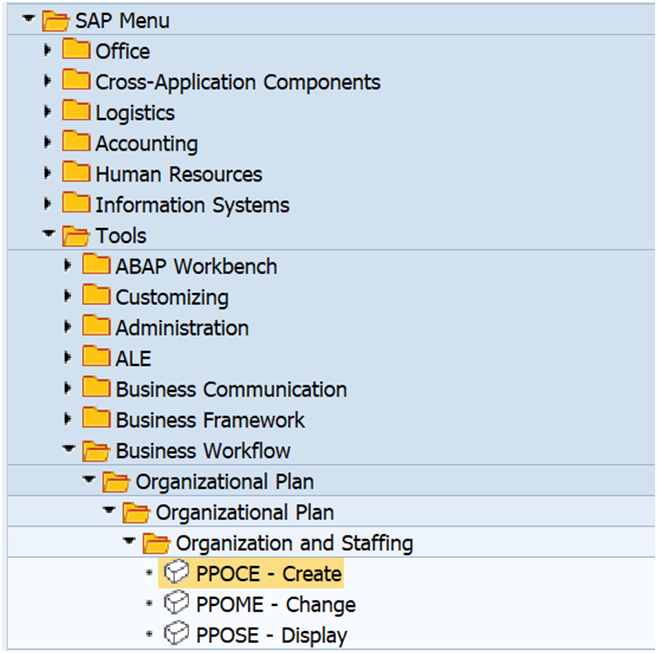
Several icons allow you to build a hierarchy that allows you to define any structured information. In our case, we define a structure that represents our company and the Business units of our company. In our hierarchy, the last element will be the SAP user defined as a validator assigned to a dedicated level of the release strategy.
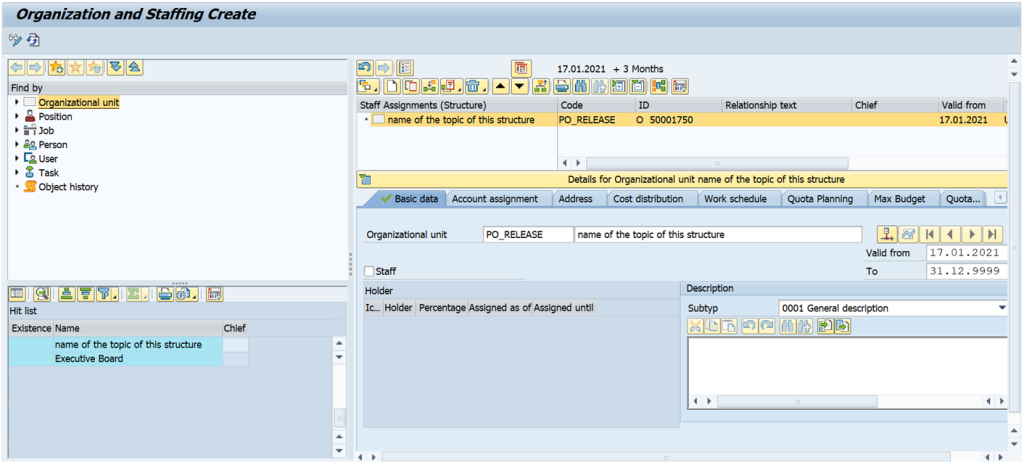
Build the company hierarchy with tcode PPOCE.
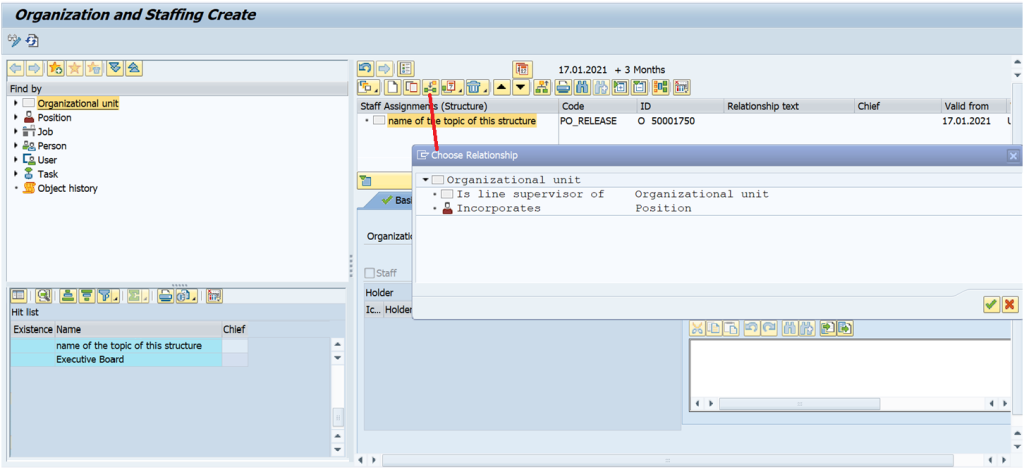
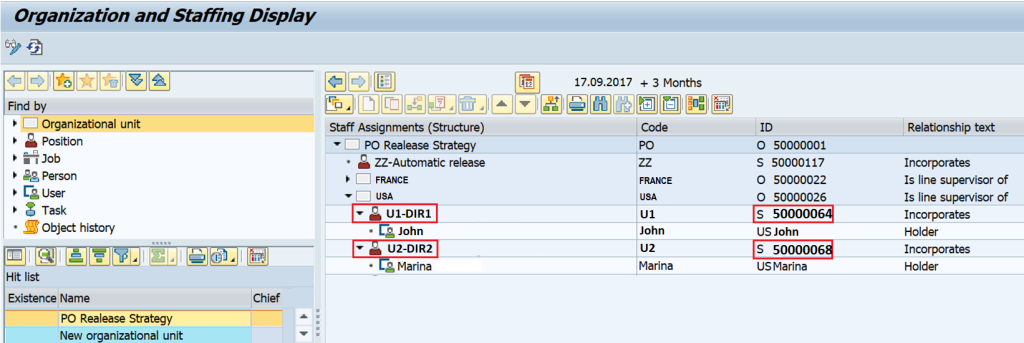
As a final result we have defined a structure representing our entities in France and USA. As subnodes, we use the position element that is representing the levels of validation so we name the positions as the release codes we will define for our release strategy (i.e codes ZZ, 2B, 2C, 2D, etc…).
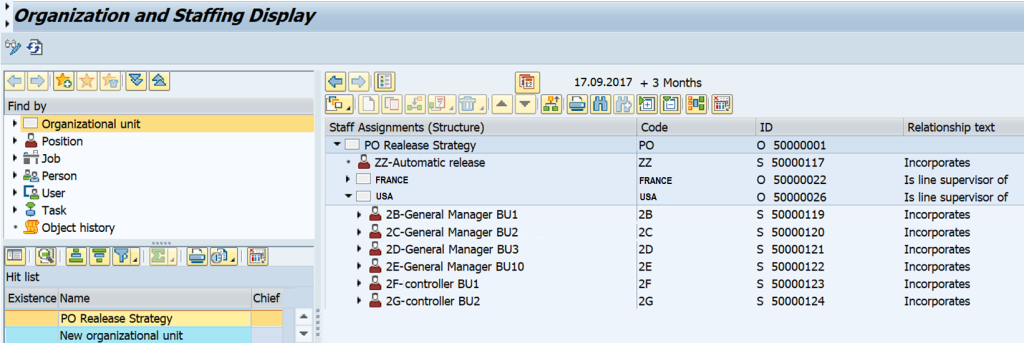
Please note that in the column ID of this screen, SAP has assigned a workflow number to each node of this structure. That workflow number is the link between what we will design in the SPRO (see below in this article) and the PO release workflow.
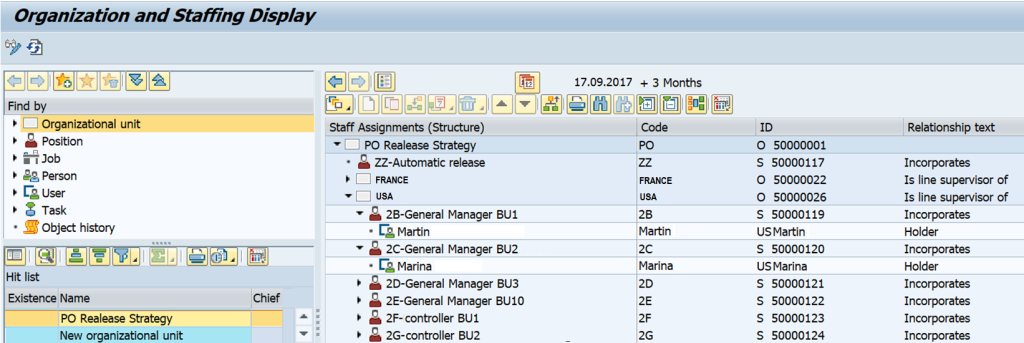
Now we can assign the SAP users to the release codes with the tcode PPOME.
C) Define the release procedure
IMG path: Materials Management > Purchasing > Purchase order > Release procedure for purchase orders
Tcode: SPRO
In this step, you build the release procedure for purchase orders and you can link it to the workflow.
Requirements
In the case of a release procedure linked to workflow, you must have previously created the usernames, positions, jobs, etc. using Tcode PPOME.
you must assign the authorization M_EINK_FRG to the persons who are to be involved in the release procedure (Authorization Management -> Create Authorization Profiles and Assign to Users).
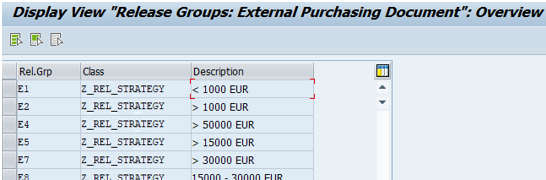
1) Activity 1: Release group (table T16FG)
Create a release group for your release procedure and assign it to a class. In the process, you assign release conditions to the release procedure. In our model, the release group represents the threshold amount of a strategy.
2) Activity 2: Release codes (table T16FC)
Here you create the release codes you need for your release strategy and assign the codes to your release group. If a release code is to be used in workflow, indicate this accordingly in the Workflow field.
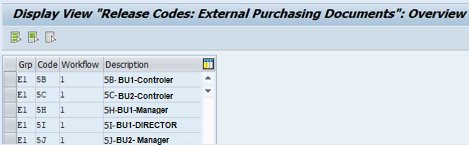
elease code is the level of validation to be used in a strategy. A release group may contain from 1 to 8 release codes, i.e 1 to 8 levels of validation.
The Workflow indicator is also used to control role resolution:
- “1 – Role Resolution with Group, Code and Plant (T16FW)”
If you indicate the value “1”, SAP will check the table T16FW to link your release code to the workflow number id linked to a SAP user (the person in charge to validate the level of the strategy).
- “9 – Role Resolution via User Exit”
If you use the value “9”, SAP will check the customer exit M06E0005 to define a role resolution of your own.
3) Activity 3: Release indicators (table T16FL)
A release indicator shows the release status of a PO. Until the last validator of the release strategy has given his validation, the status is “Blocked”, and when all validators have validated the strategy, the indicator turns to “Released”. The release ID (value “A” or “B” appears on the header of the PO.
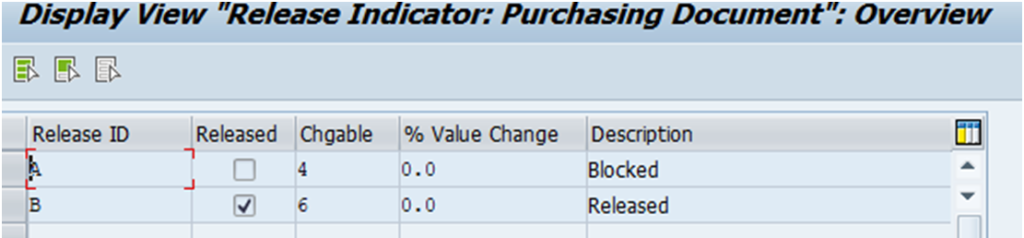
Via the following settings, you can define the release indicators you need for your release procedure:
- Output messages are generated when the status is “Released”.
- “% value change” is a tolerance to reset the strategy to “Blocked” status if the user raises the quantity or the amount of the PO.
- Set the Changeability indicator to “4 – Changeable, new release in case of new strategy or value change” or “6 – Changeable, new release in case of new strategy or value change/outputted” and enter a percentage in the Value change field.
4) Activity 4: Release strategies (table T16FS)
Create a release strategy for your release group and assign your release codes accordingly.
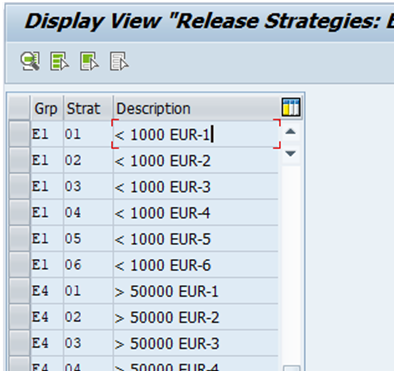
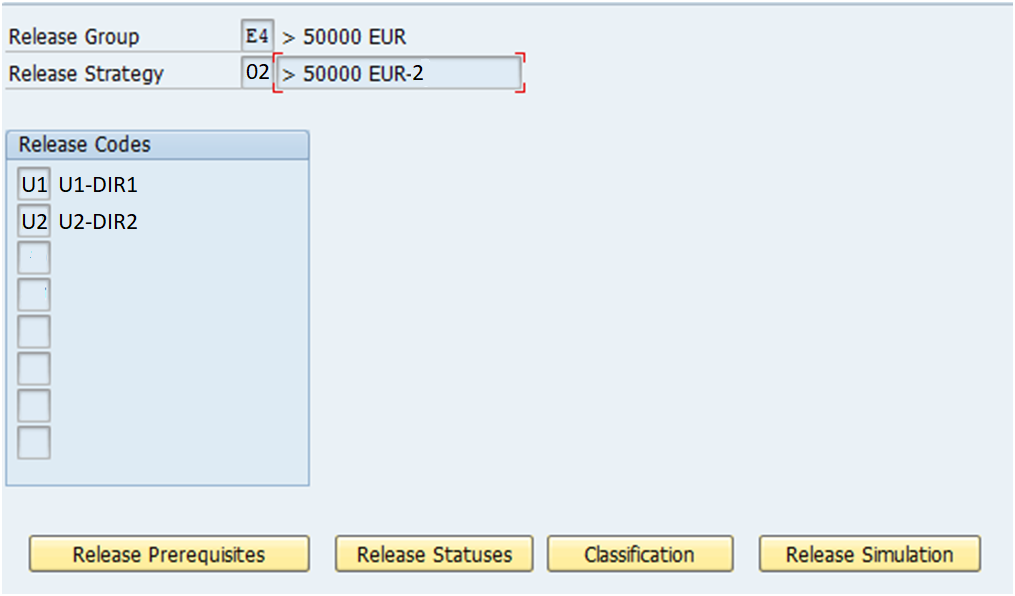
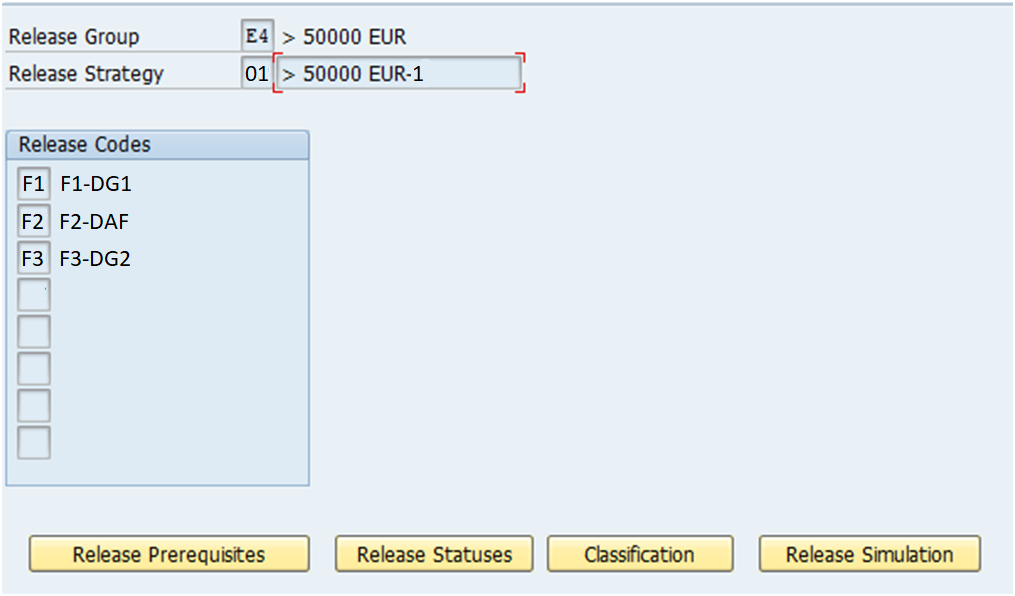
As you can see, the release group is linked to the release codes (see previous chapter) and the release group is also linked to a strategy number. And you can see that several strategy numbers can be defined for a release group.
Why do we define several strategies for the same threshold amount ? because we want to separate the validators from USA team and the validators from France team. I will have a release group E4 assigned to amounts > 50000 EUR, to be validated by 3 managers in France, and the same threshold amount to be validated by 2 managers in USA business unit. So i will have to assign 3 release codes (F1 for manager 1, F2 for manager 2, F3 for manager 3 in France) linked to 3 users in tcode PPOME (Pierre, Paul and Jacques). And those users are different from the BU in USA where i will need to define 2 release codes (U1 for director 1 and U2 for director 2) linked to 2 users names in tcode PPOME (John and Marina).
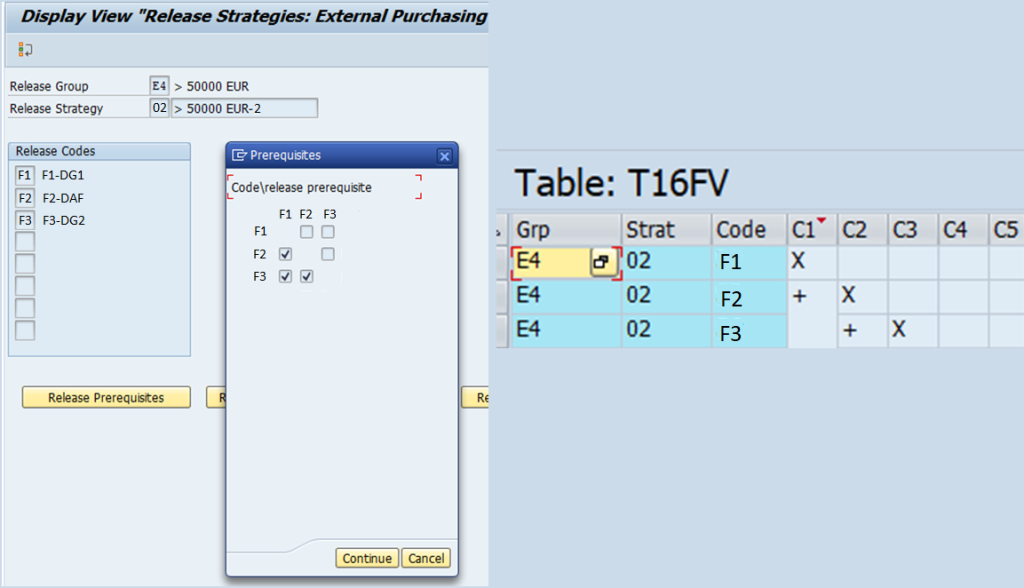
- Release prerequisites (table T16FV)
With the release prerequisites, you specify the order in which the individual release points (individuals or departments) represented by the release codes may release the document.
Example
The following table shows release prerequisites for a strategy with three release codes. The checkboxes activated are driving the sequence of each code validation. Here it means to validate code F1, then F2 then F3.
Code/Release prerequisite:
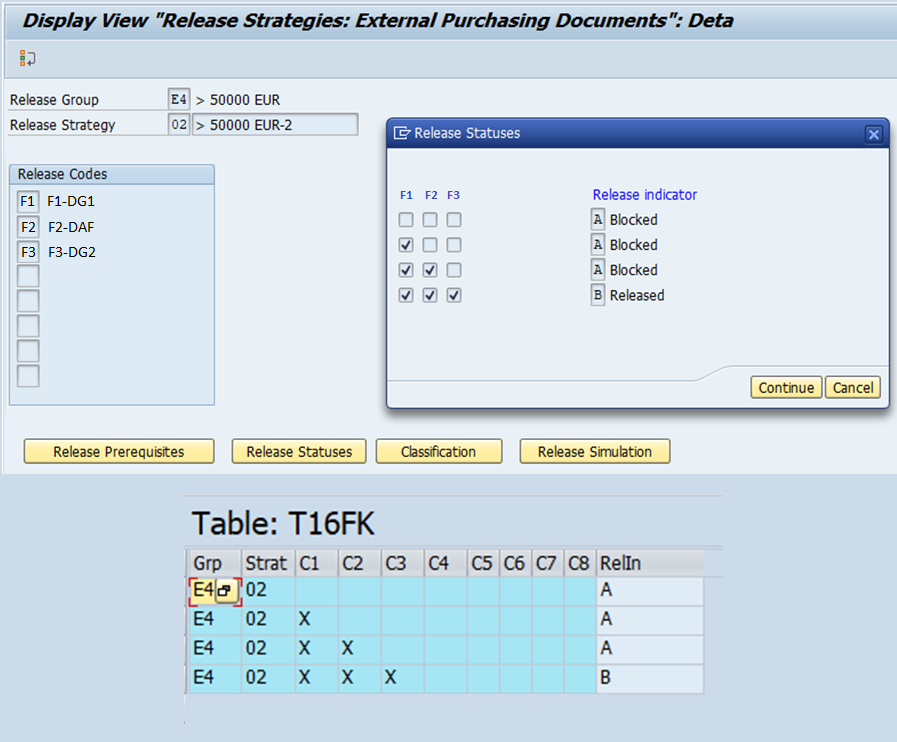
- Release statuses (table T16FK)
Here you specify the status a PO will have after certain release points have been released.
Specify which release indicator/status a PO is to have after having been released via a certain release code.
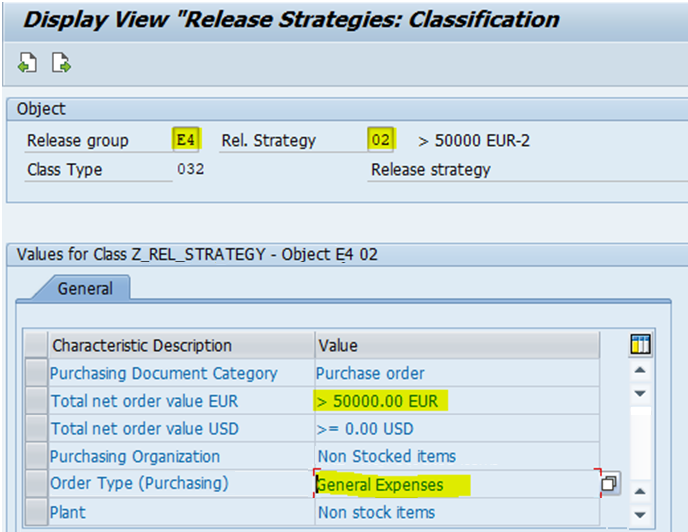
- Classification (tcode CL24N)
In classification, you maintain the values assigned to the characteristics (defined in previous chapter above).
Via the characteristics and their values, you specify the POs to which your release strategy is assigned.
Example
Two characteristics and their values have been maintained in classification for release strategy ‘E4 02’:
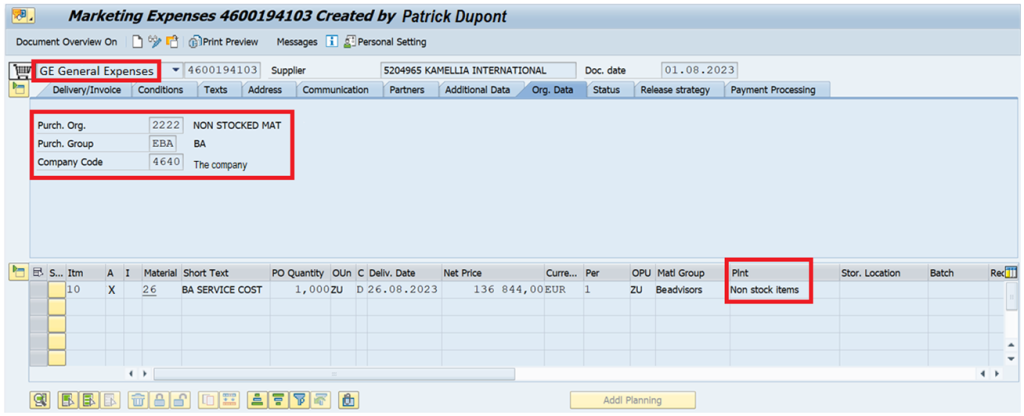
– Purchasing Document type – ‘GE – General Expenses’
– Total value – above €50,000
All POs with the document type ‘GE’ and a total value more than €50,000 are thus subject to a release procedure with the release strategy ‘E4 02’.
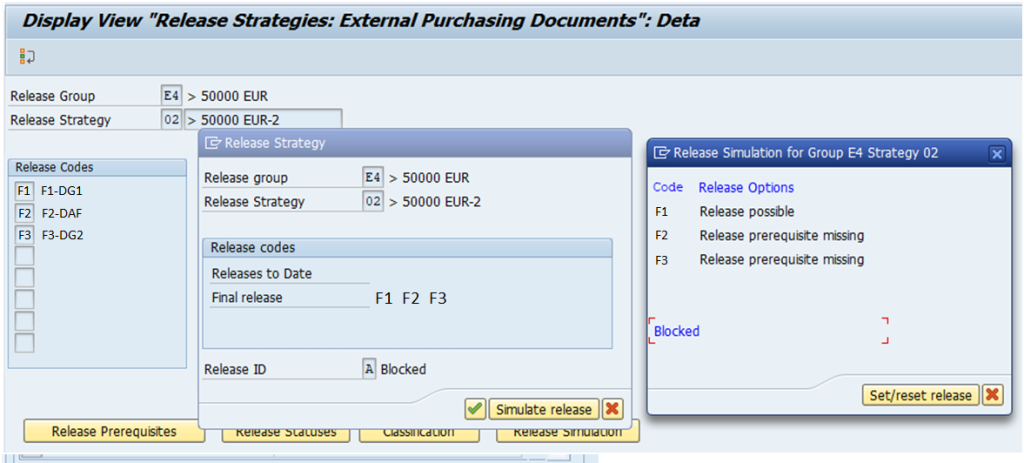
- Release simulation
Choose “Simulate release”. The strategy is displayed with status “Blocked”, and release the document with the desired release code by double-clicking (F1 then F2 then F3 to reach the status “Released”).
The system shows you which status the PO now has because of this release.
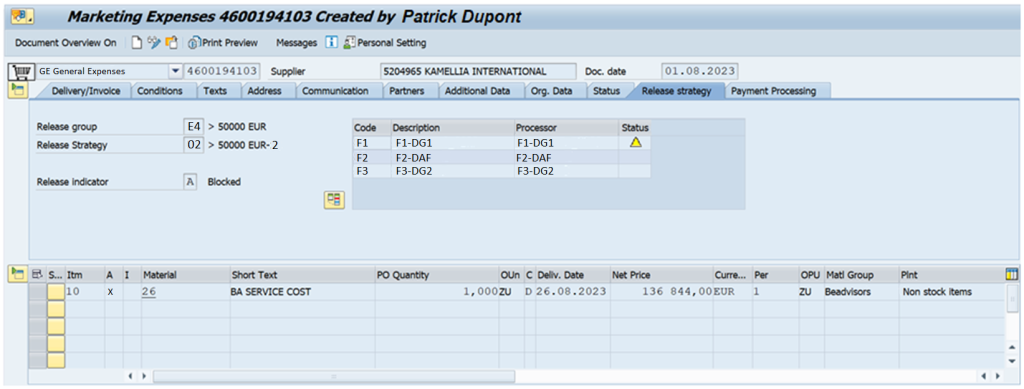
It looks like this on the PO:
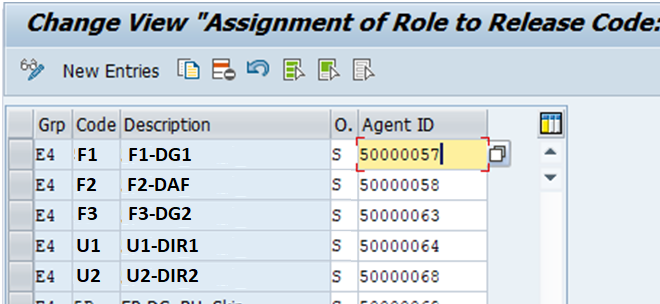
5) Activity 5: Workflow (table T16FW)
Using PPOME tcode, the business team will define a hierarchy of release codes, copy of the ones available in table T16FC.
Each release code will be identified with a workflow ID number.
The processor (member of staff responsible for processing the document) will then receive a work item when he or she is required to effect release.
You can assign a processor ID either directly or indirectly:
- Directly = you enter a username as the Agent ID (with corresponding object “US”)
- Indirect = you enter a job, or a position (object “S”) with the workflow ID number generated from PPOME tcode.
At runtime, the system will then determine the member(s) of staff responsible for processing the document.
To be able to assign a workflow Agent ID, this agent ID must exist in the client system where you are making this assignment.
Conclusion:
PO validation customizing is made of many steps but it is a powerful way to control the purchasing flow.